TVP – Textured Vegetable Protein

No particular reason for this brand except that it was $2 at my local grocery. I’m not vegan nor vegetarian. This is based on soy.

I decided to give TVP a try simply because at the moment fresh vegetables and meat is  getting quite  expensive and I wanted not exactly a total alternative to meat but a way to bulk it out and still keep the meal filling.

Things I learnt and what I did to make my meal below.

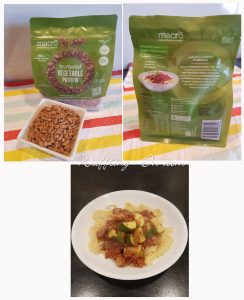
TVP needs to be hydrated and it needs flavour. I used equal amounts of hot stock (using a cube) and TVP in a bowl, let sit for 5 mins or so giving it a stir and covered.

While that was sitting I made my spaghetti bolognaise as per usual but only putting about 1/4  the amount of beef mince in. When all was ready and gently simmering I mixed in the hydrated TVP and let simmer for as long as able to absorb all the flavours.

My hubby didn’t notice anything amiss so I’m guessing that this meal was ok and served with garlic bread as usual.

Will I use again, yes.

I think for the moment I will keep it to meals with sauces like spaghetti sauce, lasagne, taco, burritos or maybe my next try will be as a savoury mince.

From what I can gather there is a different way to prepare  the TVP, different stock to TVP ratios for things like rissoles, meatballs, hamburgers, meatloaf etc.

For now I think I’m happy with how it’s going. My meat to TVP ratio will probably change as time goes by.

Let me know if you’ve given textured vegetable protein a go.
Frozen vegetables

I always have frozen corn niblets and peas in my freezer to me they are a life saver. I do buy them fresh when in season sometimes but mostly these are my go to frozen veges.
I do also have frozen broccoli and cauliflower in my stash but I mainly use these for soups, casseroles or vegetable bakes.

I have to say that after the recent floods/petrol hikes and COVID and the lack of availability of fresh items or the dollars being charged to buy my favourite items I’m doing a bit of a rethink on my frozen vegetable usage.

Trying to keep the frozen broccoli and cauliflower in the best eating condition I’ve found that you need to steam them in stove top steamerpot/insert and cook them to just al dente or they go mush when serving. The best outcome for all I think is to steam to serve, and if they are a little overcooked I’ve found grated cheese, white sauce  or gravy over the top hides a few of those serving sins lol.

Have you had to rethink they way you buy your groceries, green or otherwise?

My fresh vege I always try to shop local but sometimes that’s just not possible.

Bulk


Bulk - Vanilla cake mix

1 large mix to store in the pantry to make into cakes. Like a packet/box mix but in bulk.
Prep Time 15 minutes
Course Cakes, Slices & Breads
Servings 3 Approx full cakes.

Ingredients
  

  • 800 Grams Plain flour
  • 750 Grams Caster Sugar
  • 45 Grams Baking powder
  • 5 Grams Bi Carbonate of soda
  • 5 Grams Salt
  • 35 Grams Corn flour

Instructions
 

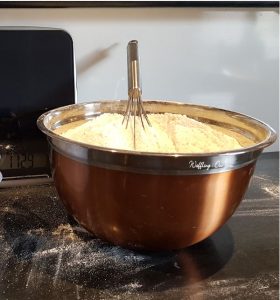
  • Place all the dry ingredients excluding sugar into a bowl. Sift. (I sifted all into one bowl then sifted into a second bowl until all was combined as it was easier to handle). Add sugar and mix through.
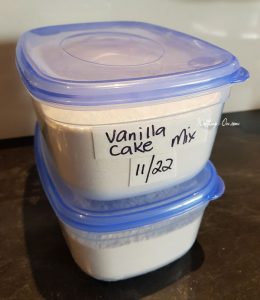
  • This dry mix will last as long as the shortest date on your ingredients. Take note and date your storage container. Label with the below wet ingredients to make the cake. Store in the pantry.
  • ***To make a cake for a 21cm round cake tin.***
  • 400 grams dry cake mix.
    2 eggs (medium).
    3 tablespoons softened butter.
    2/3 cup milk.
    1 teaspoon vanilla.
  • Pre heat oven to 180°C
  • Place dry cake mix into a bowl adding softened butter.
  • Mix milk, vanilla and eggs into a small bowl and beat.
  • Pour wet ingredients into the dry ingredients and mix well. (By hand or mix master.)
  • Pour the cake batter into a lined cake tin and bake for approx 25 minutes or until a skewer comes out clean.
  • Cool on a wire rack. Ice
  • Store in a sealed container for approx 3 days in the the pantry

Notes

If you go through a lot of cakes and wish to make a bigger dry mix just double the ingredients listed.
I say approx in how many cakes it makes because sometimes I make a 1 1/2 amount of cake mix to make a larger cake in a big tray.
My mum likes a smaller cake so I halve the dry and wet ingredients for her much smaller tin.
1 single batch makes about 8-10 cup cakes.
Yes you can freeze the completed cooked cake.
Because I make variations on the amount of cake mix used so far I've not finished the bulk mix in an even amount. I just make up more and add the old to the new.
Yes you can add choc chips or coconut or dried fruit etc, treat this mix like the average packet/box mix.
Any questions I'm happy to answer them.
 

Shredding and freezing potatoes

 I’ve never seen them in store over here unless they are in a Cost-co that I refuse to pay a membership for.

So I decided to experiment and freeze my own shredded potatoes.

What worked for me. (pictures below, left to right 1, 2, 3, 4 and 5).

180*C pre heated oven.

I peeled half a dozen mid sized brushed (dirty) potatoes.

Put them through my food processor with the grating/shredding blade.

Placed the shreds on several clean tea towels and squeezed all the moisture out, as much as possible.

On 2 large lined baking trays I spread them out, placed them in the oven for 5 minutes. I took them out and forked them over and shuffled them around. I did the 2 trays on 2 racks at the same time rotating shelves at the same time. 2 lots of 5 minutes. They will be sticky as they still have some starch in them.

I then put the shreds on a wire baking rack (grid style). Cooled for 5 minutes.  I placed in the freezer in a plastic (food safe) bag still on the wire rack until mostly frozen.

Placing the shreds in a labelled and dated Zip lock bag with the air still in. When frozen I jostled them all around and squeezed out all the air to keep for safe freezing. 2 trays in 1 zip lock bag.

-With the shreds so far I’ve only done potato nests  which were quite crisp and tasty. I defrosted the potato on paper towel to take away any condensation moisture.

-Roughly taking  a cup full of shreds to place in a bowl I  seasoned with salt and pepper.

– Into a shallow frying pan add enough oil to cover the bottom of the pan and then a bit more. Once heated place a handful of shreds into the pan and give a little pat being careful of the hot oil.

-Once nicely browned on one side flip over and do the other side. Drain on paper towel.

*Note the more oil the more crisp they’ll be.

* Have the oil hot enough that it starts the cooking straight away but not Continue reading

Honey butter

My granddaughter loves honey on her bread or toast and now she likes to ‘do it herself’ but the butter is making it’s way into the honey jar and for me this just won’t do!

So the quick fix is her ‘special’ honey butter. Easy

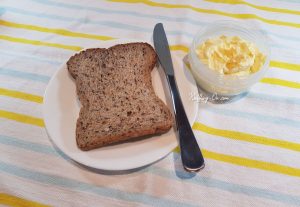
2:1 ratio of honey to softened butter (nuttelex or margarine if that’s what you use).

Mix  well.  I drizzle a little extra on top each time we use it so she can ‘see’ the honey. Store in a lidded container in the fridge.

This should last for a couple of months or the use by date on your butter, to be honest it’s so easy to make I just mix a half cup of butter and 1 cup of honey batch at a time and it lasts us a few weeks.

Of course if you like more honey add more honey to your mix.

If the butter is softened enough it’s easy to mix by hand in small amounts. If you’re doing a larger batch the mix master would blend it quite quickly.

Great for a quick butter before you pop on your sliced banana. Banana and honey is one of my favourites.


Load more